Table of contents
Raptoreumcore is currently supported on Ubuntu 20/22, Windows 10/11, ARMx64, and macOS. While it may work on other versions or operating systems it is not recommended.
Installation
Windows comes packaged as binary files or a .exe. For the binary files, it is just a matter of unpacking them in a directory of your choice and running raptoreum-qt.exe. The installer is similar to most other installers; you will have the option to choose where the wallet and blockchain data is stored, leaving as default is fine for most.
Installing on Ubuntu is as simple as downloading the release, unpacking it, and running raptoreum-qt.
To install on macOS, you can use the DMG or you can download, unpack, and run raptoreum-qt directly.
To install on ARMx64, download the release, unpack, and run raptoreum-qt.
Default Data / File Locations
By default all data including wallet.dat files are stored in the following locations:
- Data:
C:\\Users\\<user>\\AppData\\Roaming\\RaptoreumCore - Default wallet.dat:
C:\\Users\\<user>\\AppData\\Roaming\\RaptoreumCore\\wallet.dat - Other wallet.dat:
C:\\Users\\<user>\\AppData\\Roaming\\RaptoreumCore\\wallet name (directory) - Auto Backups:
C:\\Users\\<user>\\AppData\\Roaming\\RaptoreumCore\\backups
- Data:
$home/raptoreumcore - Default wallet.dat:
$home/raptoreumcore/wallet.dat - Other wallet.dat:
$home/raptoreumcore/wallet name (directory) - Auto Backups:
$home/raptoreumcore/backups
First Startup
When you first run Raptoreumcore it may appear unresponsive or frozen. This is normal, it has some locks in place during this time. Let it do its work, it will become responsive again when it is ready, it can take awhile. To fully download all Blockchain data it can take a few hours or more.
Navigation
In order to see most commonly used features move your mouse to the left hand side of the GUI, a menu will appear.
Encrypting Your Wallet
Encrypting your wallet should be your first step. Go to Settings > Encrypt Wallet (encrypts your wallet.dat file). Make sure you record your password somewhere safe, offline is recommended. If you lose your password you will lose the RTM in that specific wallet.
Receiving RTM
In order to receive RTM you need to create a receiving address, click on "Receive". None of these fields are required, they are used when creating a payment request (explained below).
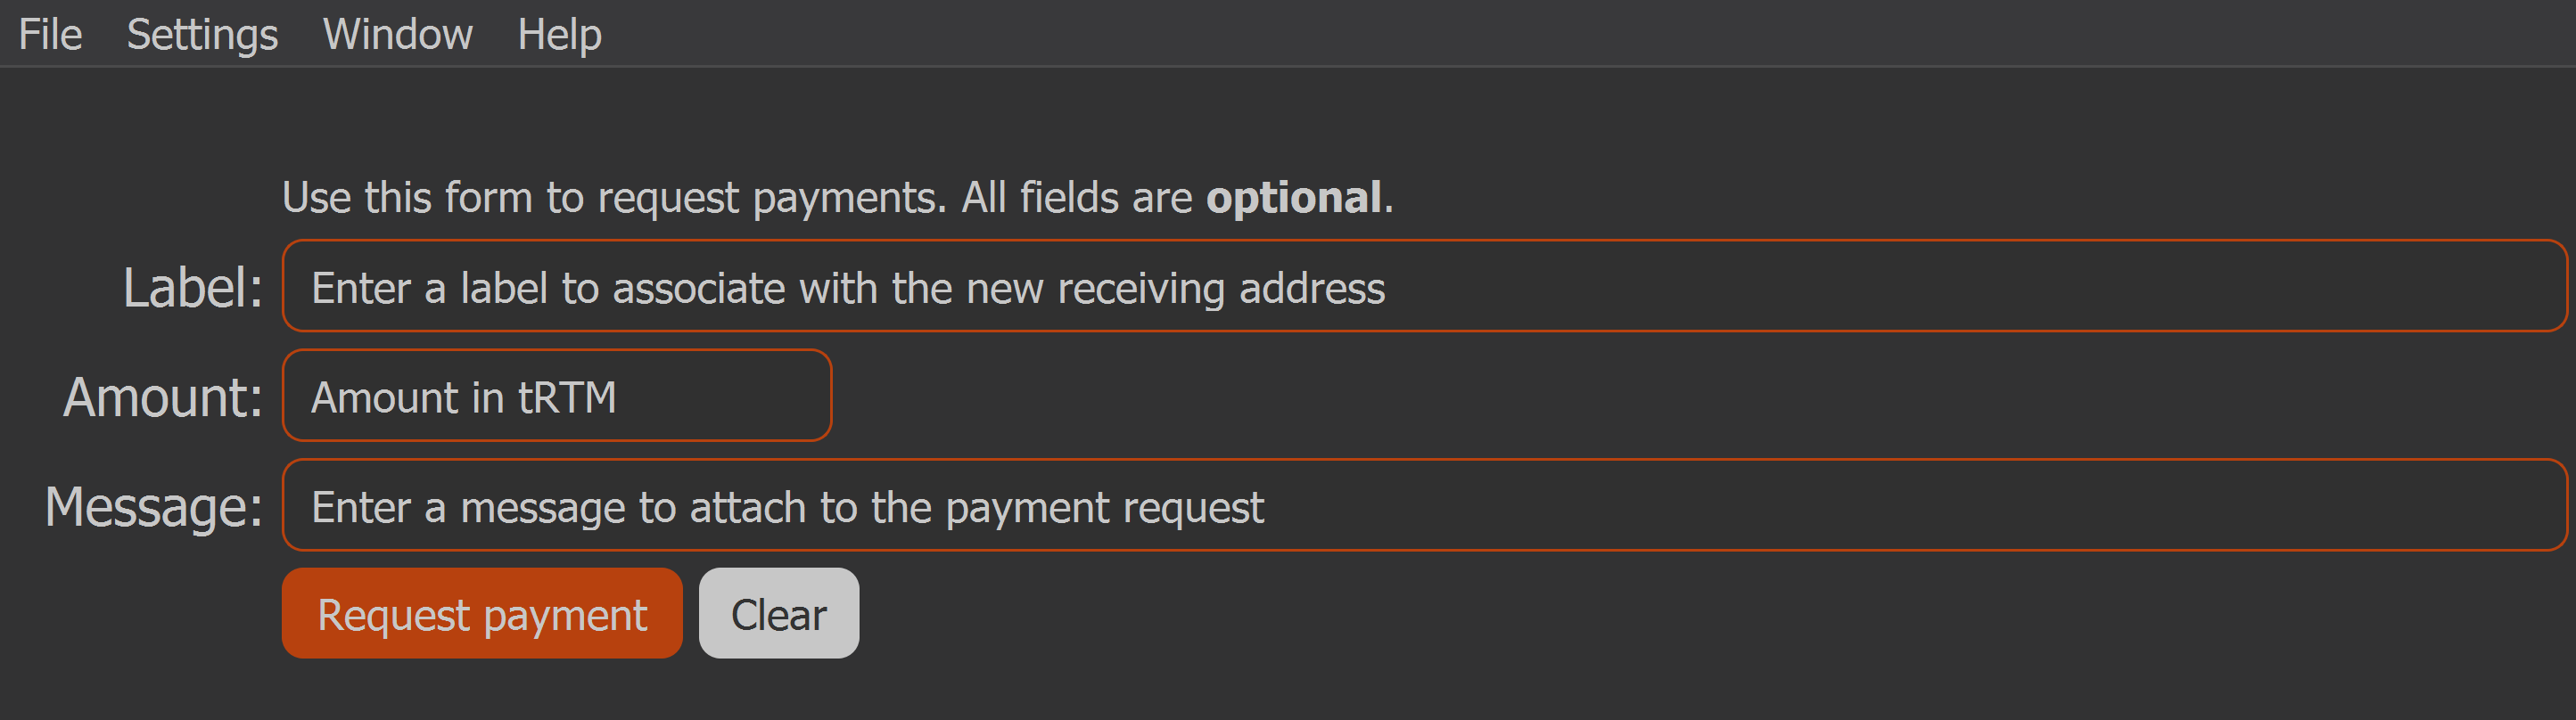
- Label: This helps you identify this address in the future and makes it easier to find.
- Amount: How many RTM to send.
- Message: This message will be displayed with payment request.
Click on "Request Payment" will trigger a window where you can copy your RTM address.
Request Payment Explained
You can think of Request Payment like a simple invoice creation for RTM. It will create a URI based on information entered in Label, Amount, Message. You can then copy the URI and send it to somebody, when enteredt in there wallet it automatically fills out the information. Or you can send them the QR Code which will do the same on a mobile wallet.
Sending RTM
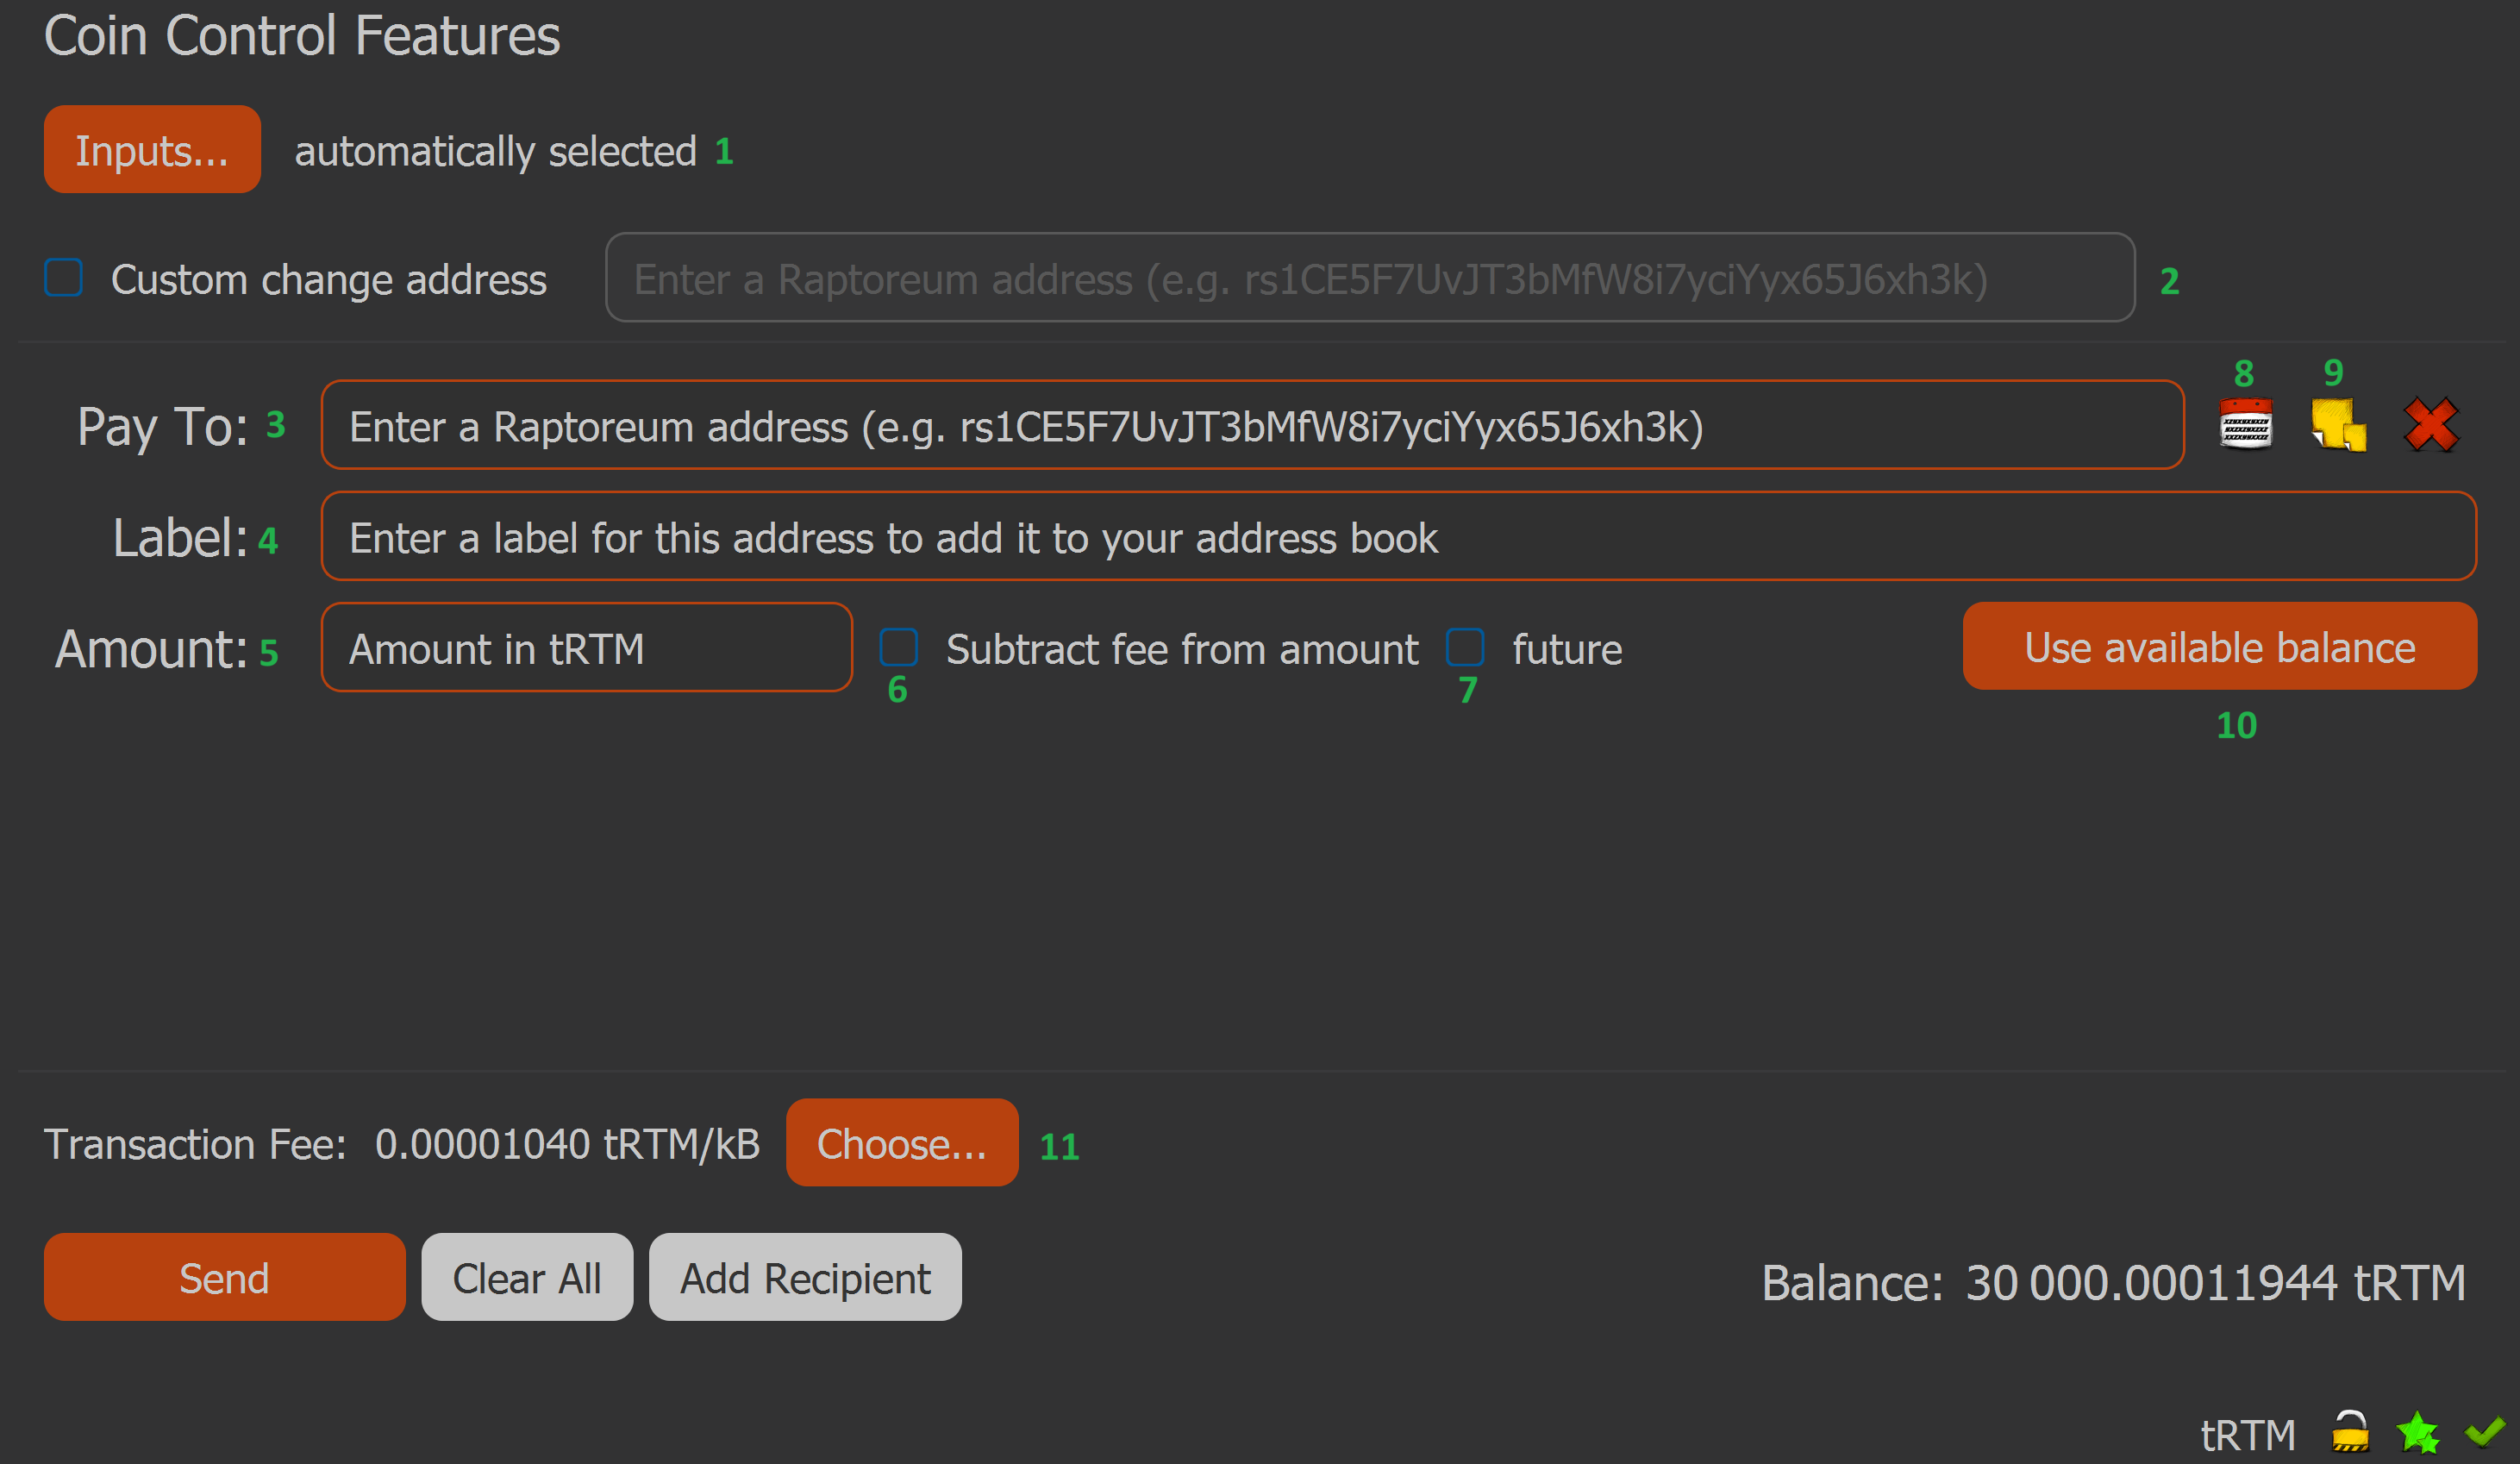
- Coin Control (optional): You may or may not see this, it allows you to select specific inputs used for sending. Enabled in Settings > Options > Wallet.
- Custom change address (optional): Set a specific address to receive unspent RTM from the transaction. If this is not set the wallet will create a new adddress automatically to receive the change.
- Pay to: The RTM address you are sending to.
- Label: Attaches a label to the address making it easier to find and also adds the address to your address book (8). If you enter this address in the future the label field will autofill.
- Amount: Amount of RTM to send.
- Subtract fee from amount: If selected fee will be subtracted from amount on send, otherwise fee comes from any other available funds.
- Future: Selecting this will add a couple of new fields:
- Maturity: Number of confirmations before the RTM can be spent.
- Lock Time: Time in seconds before the RTM can be spent.
Note: If you use both Maturity and Lock Time whichever one ends first is used.
- Address Book: Addresses which have a label added are automatically added here. You can also add addresses here manually.
- Paste address from clipboard: Equivalent to ctrl+v or right click and paste.
- Use available balance: Will autofill Amount field with all available funds.
- Transaction Fee: Choose how much to pay to send the transaction. In most cases leaving this to be determined by the wallet is fine. You can open this section and choose a quicker acceptance time in blocks. Depending on how busy the network is this may increase your fee, it also does not guarantee your transaction is accepted in X blocks.
Asset Creation
See Creating Assets
Backups
Each time you open or load a wallet the system creates an automatic backup of the corresponding wallet.dat file in raptoreumcore/backups. You should also make a habit of backing up all of your wallet.dat files, see locations. To do this close your wallet and copy all walle.dat files to another location. You should keep a copy offline, such as a USB stick.